
Have you always loved mosaic tables and wanted one for yourself? This article is for you. Today, I’m sharing how to create and personalize one of your own.
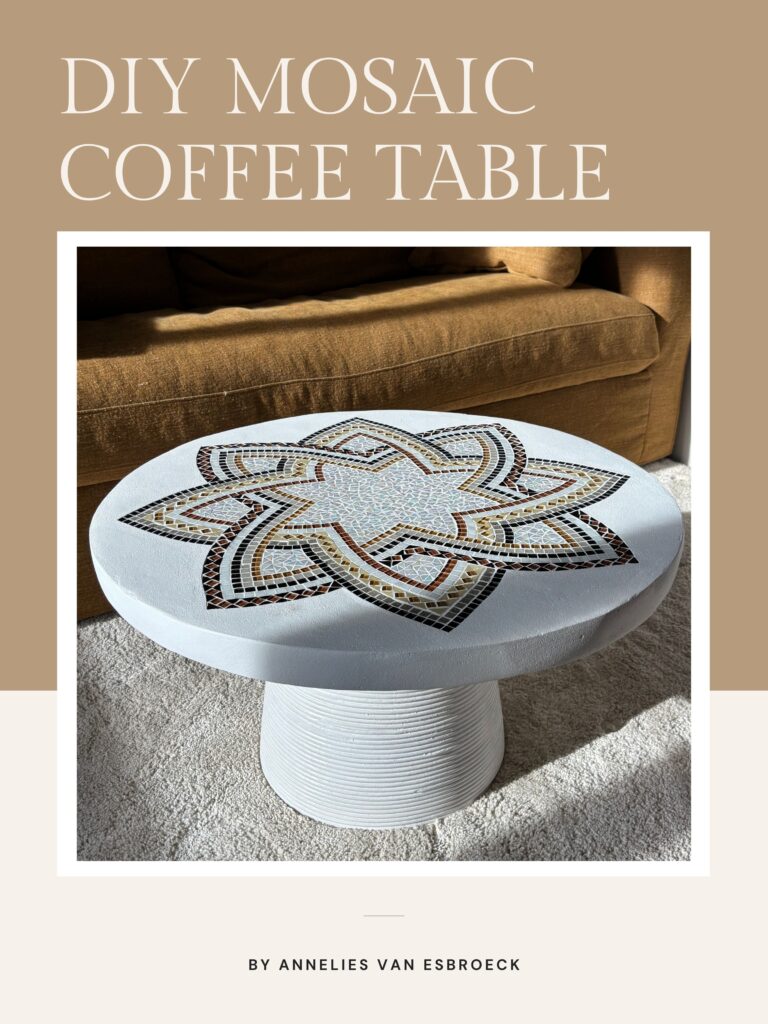
Table of Contents
Tools
- Pencil
- String or lace
- Jig saw
- Sand paper and/or wood filler
- Screws
- Screwdriver
- Paint brush
- Tile cutter
- Trowel
Materials
- MDF
- Wood Glue
- Wood filler
- Water-repellant paint
- Flower pot
- Mosaic tiles
- Normal glue
- Grout
- Concrete
- Water repellent spray
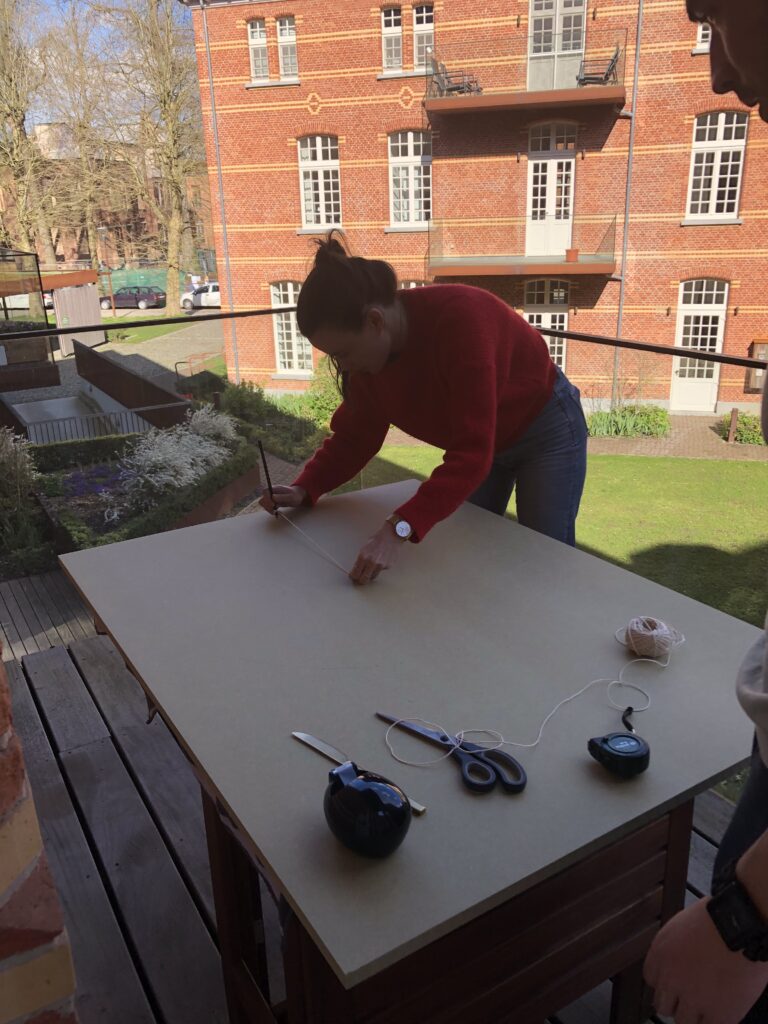
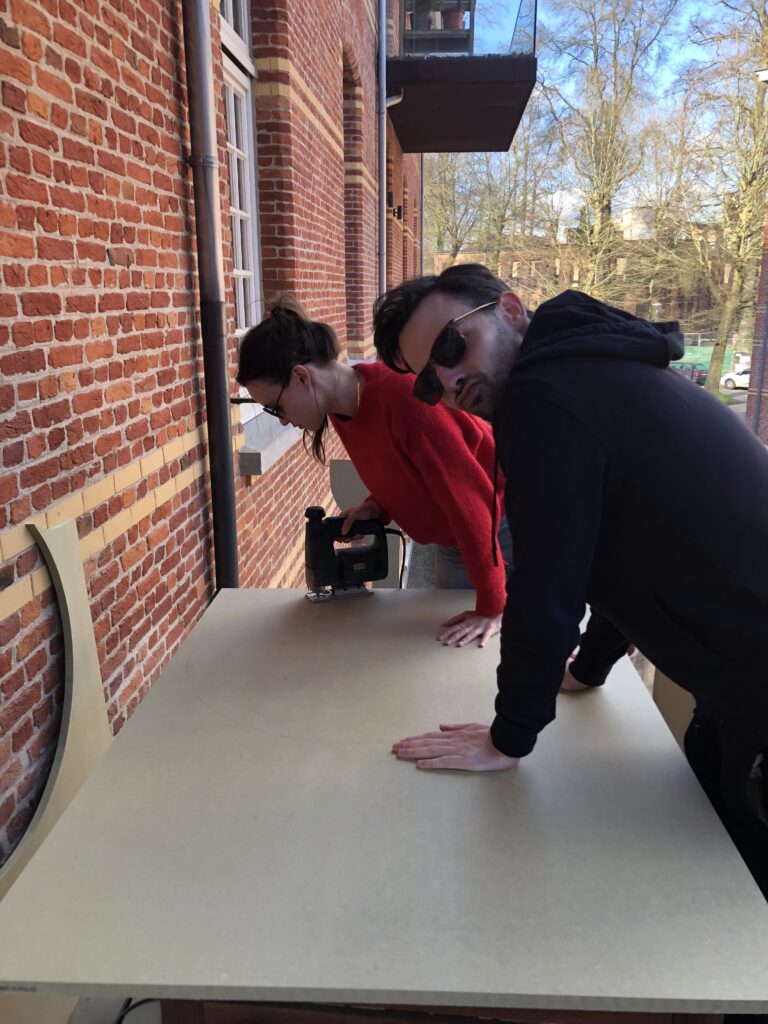
Step 1 – Draw, cut and attach the circles
Trace two circles on the MDF board using a pencil attached to a string. Next, cut along the line with a jigsaw.
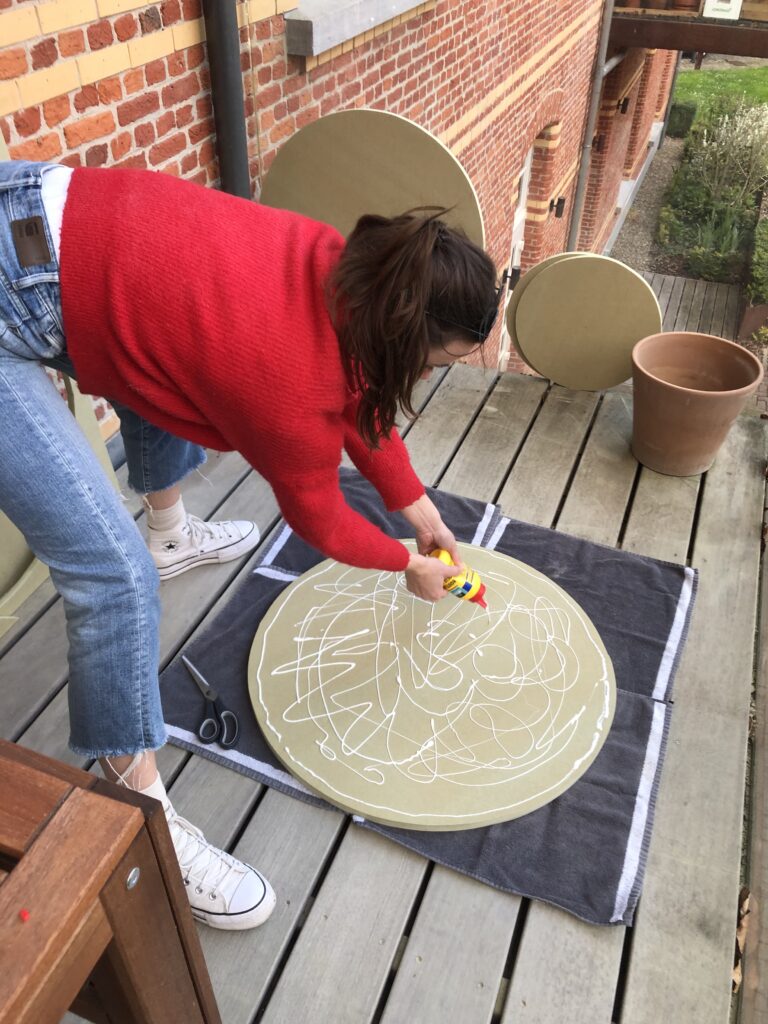
Paste the two circles together with wood glue to create a substantial tabletop. If there are irregularities, use wood filler to cover them up, then give it a light sand to smooth everything down.
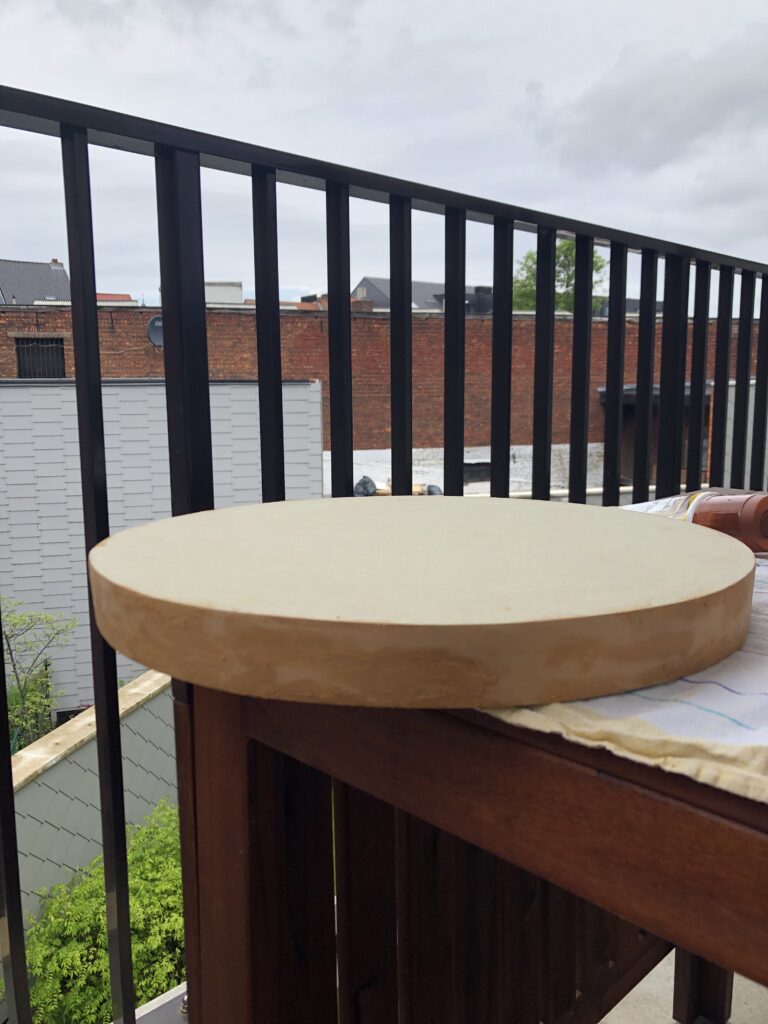
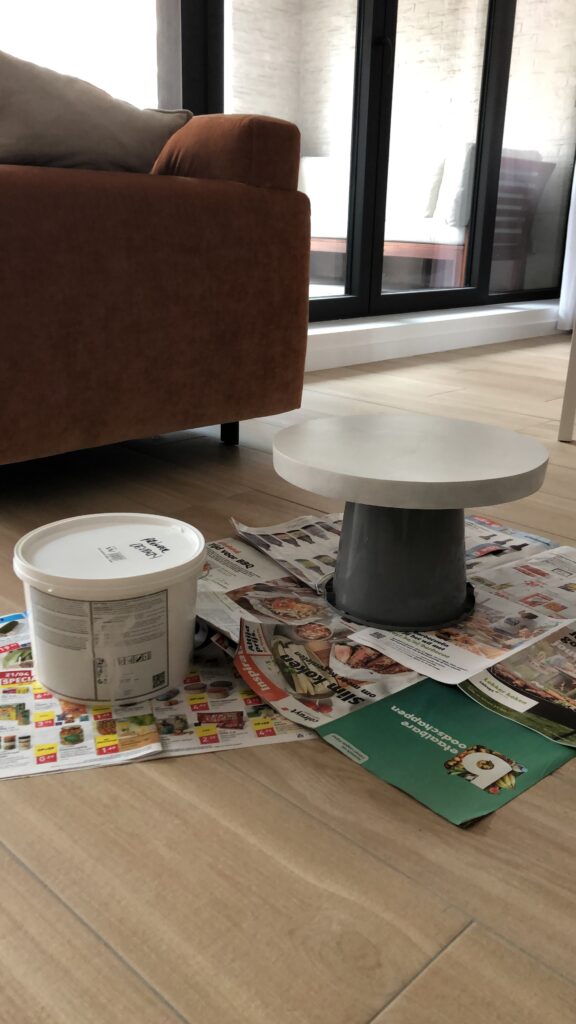
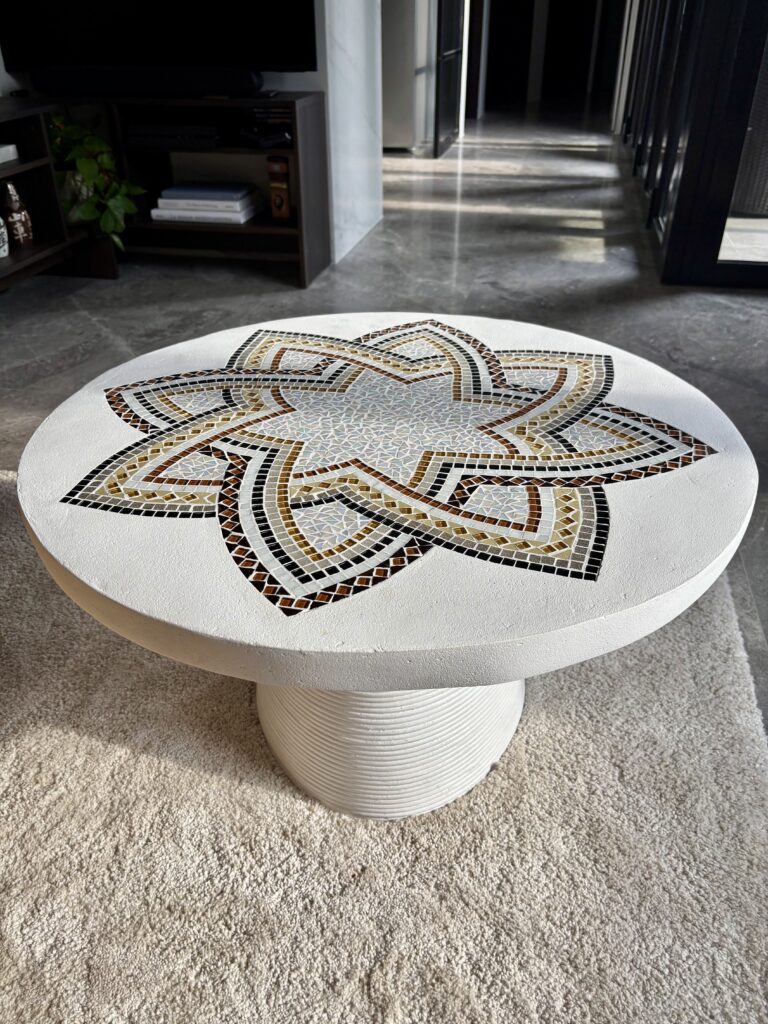
Paint the MDF board with water-repellent paint to prevent the wood from swelling later on due to moisture from the grout. Finally, add the base, in my case a plant pot from Ikea, to the table top with glue and screws.
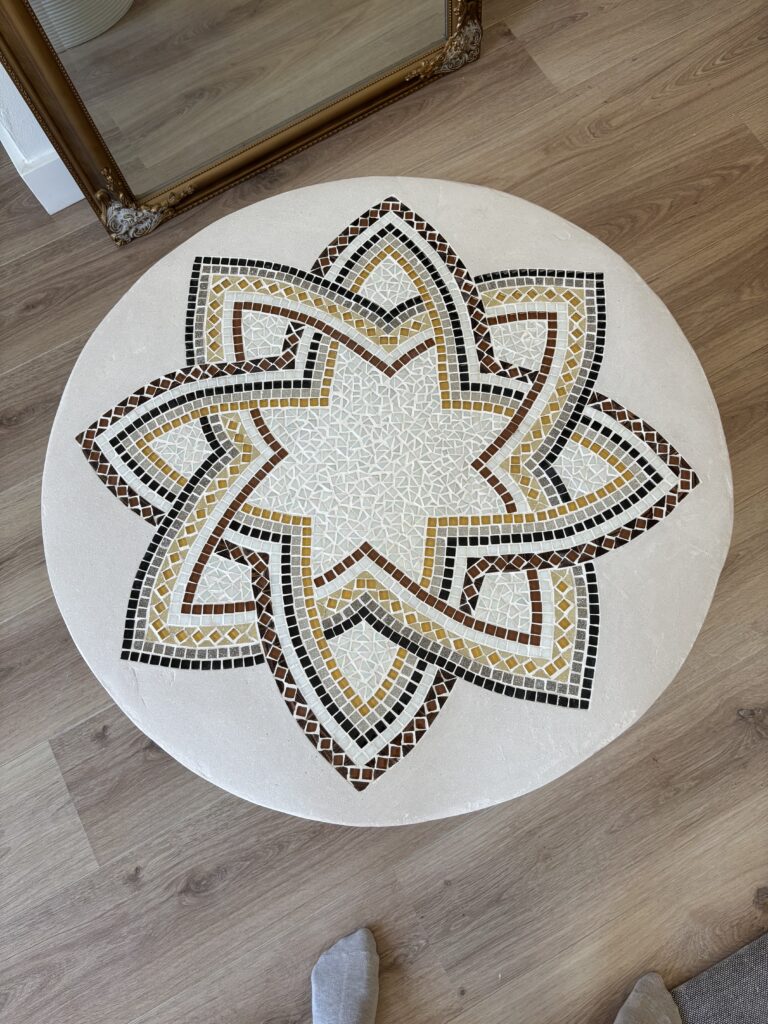
Step 2 – Lay out the pattern
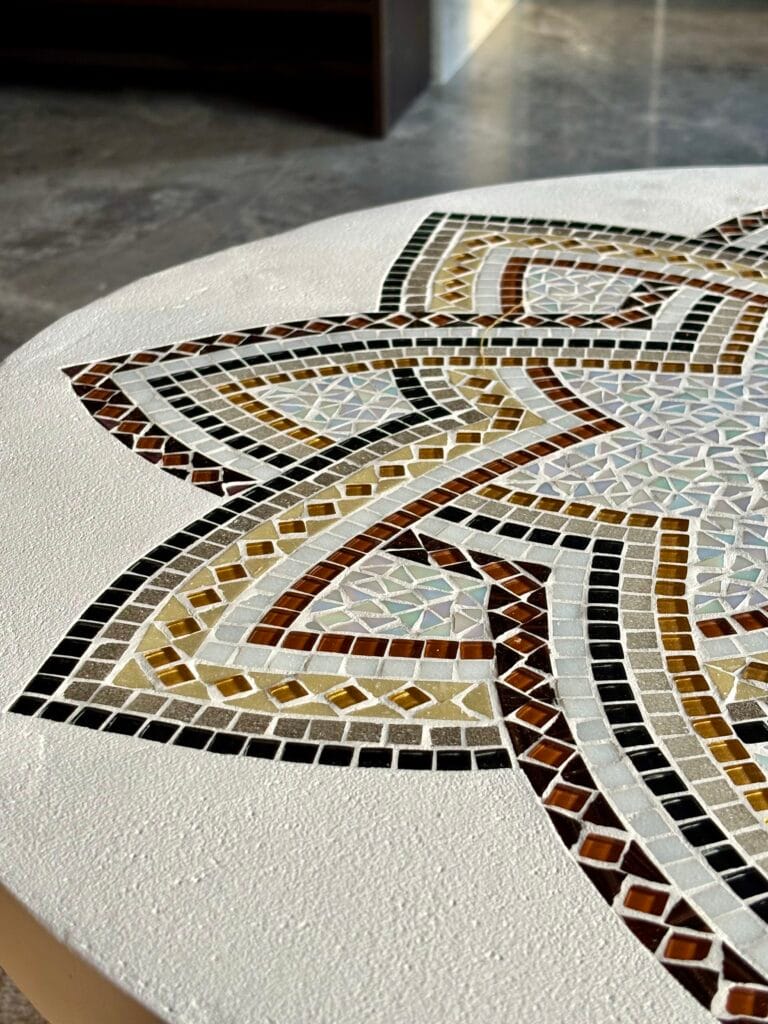
Look online or offline for a mosaic design you like and lay out the stones in the desired pattern. I chose glass mosaic tiles because they are easy to cut, less expensive, and more vibrant.
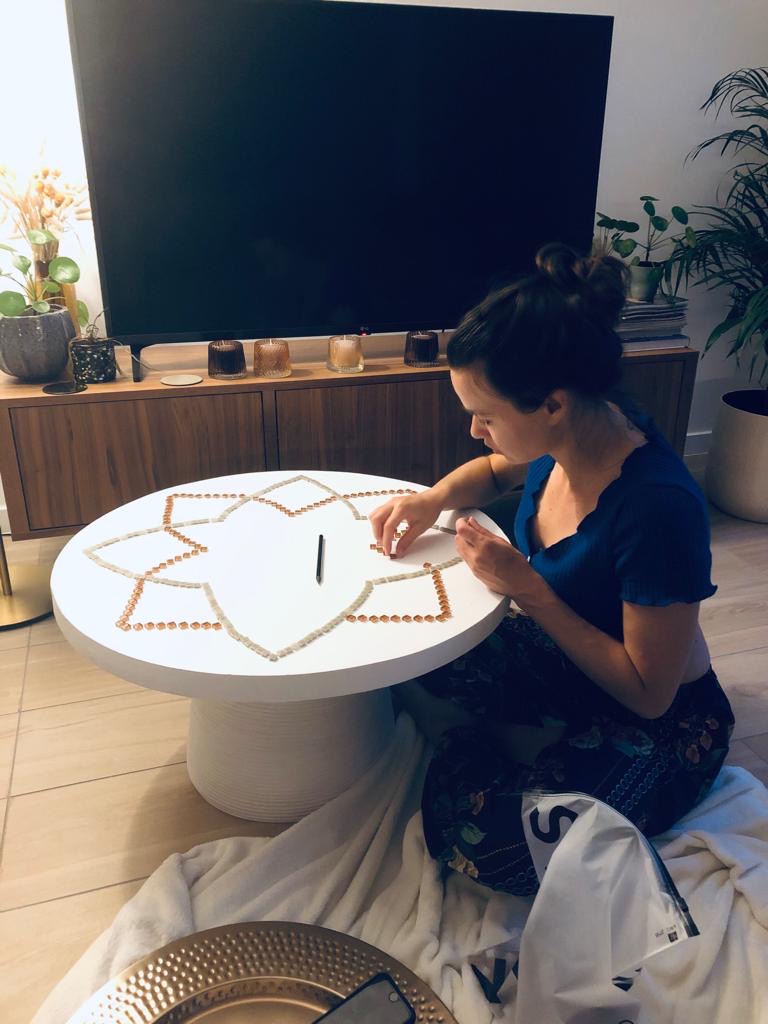
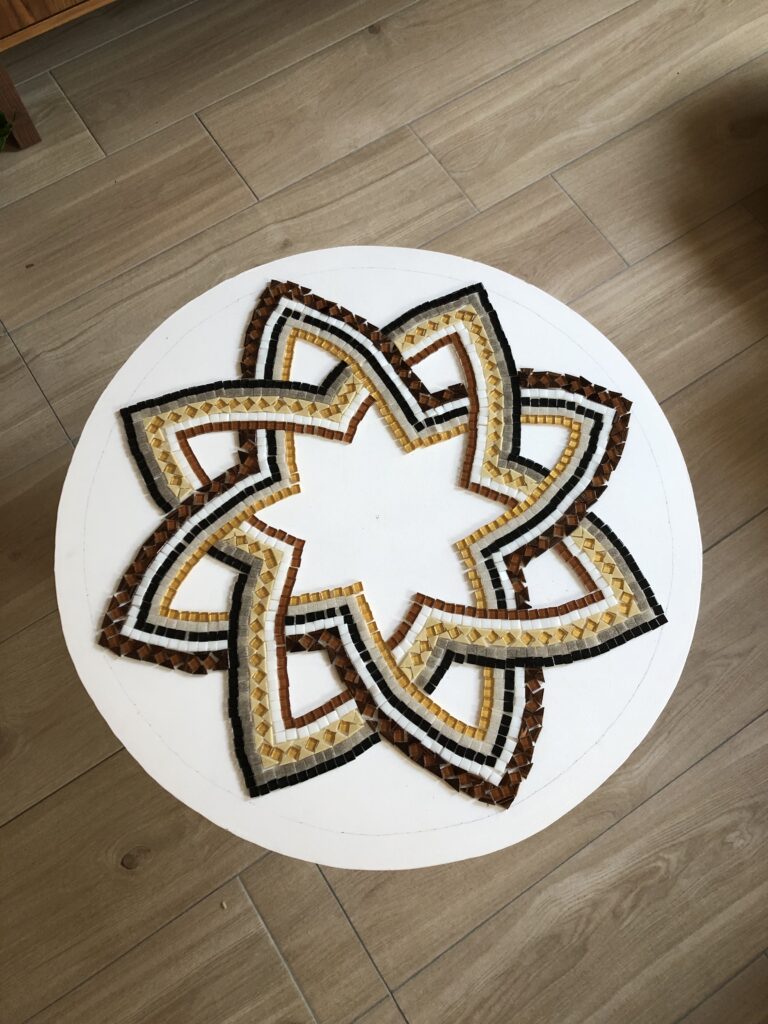
Once you have the big lines laid out, you can start gluing the stones to the table with normal glue and a paintbrush.
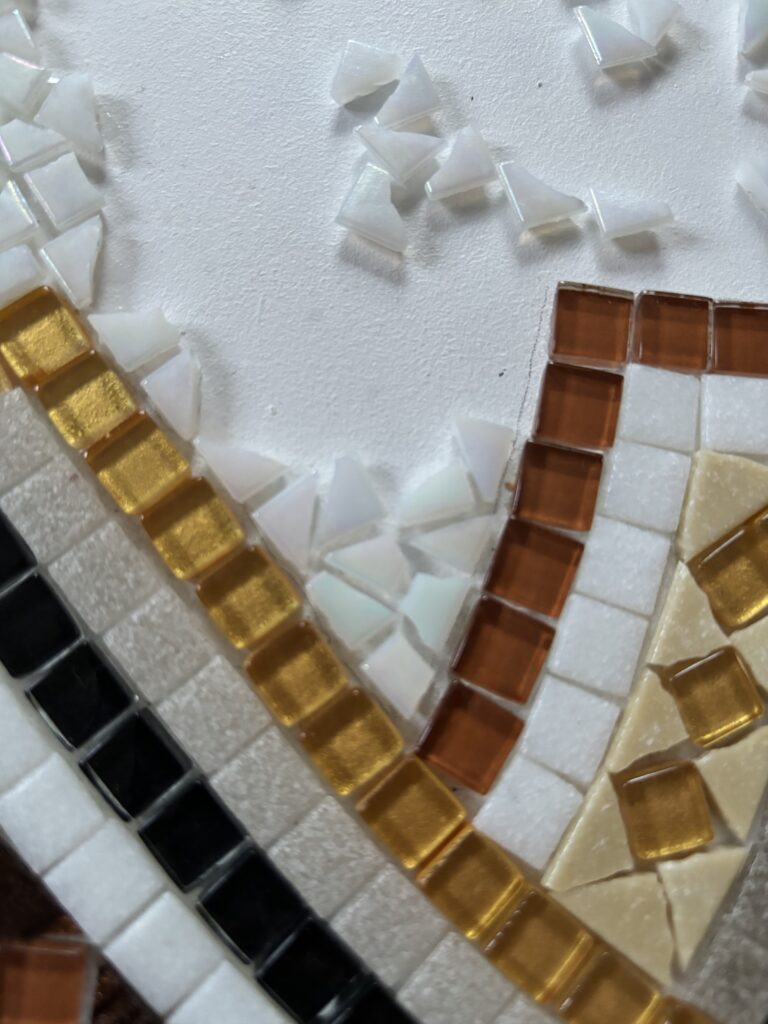
Fill in the gaps by cutting stones in different sizes. This part took me the longest, as I wanted to have irregular shapes, meaning that I had to cut and fit all different kinds of shapes, making it more of a puzzle.
Step 3 – Grout the stones and add concrete
After you have attached the stones to the table, you want to grout them to ensure they will not chip. Then, add concrete to the rest of the table with a trowel and smooth the concrete manually with sandpaper once fully dry.
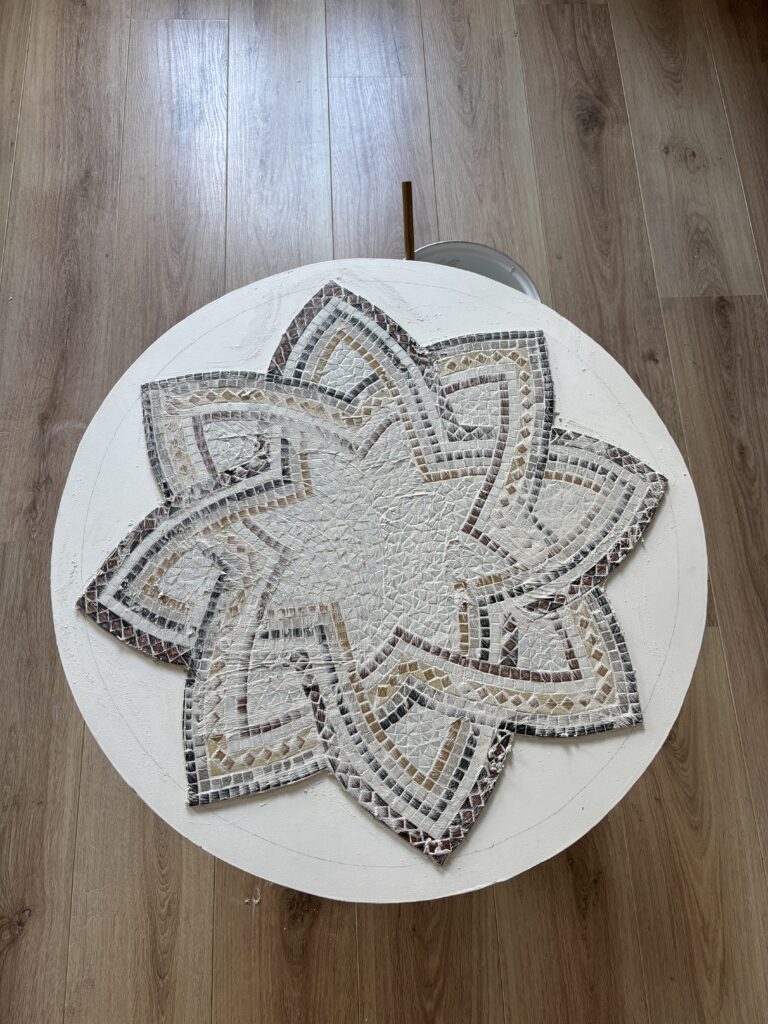
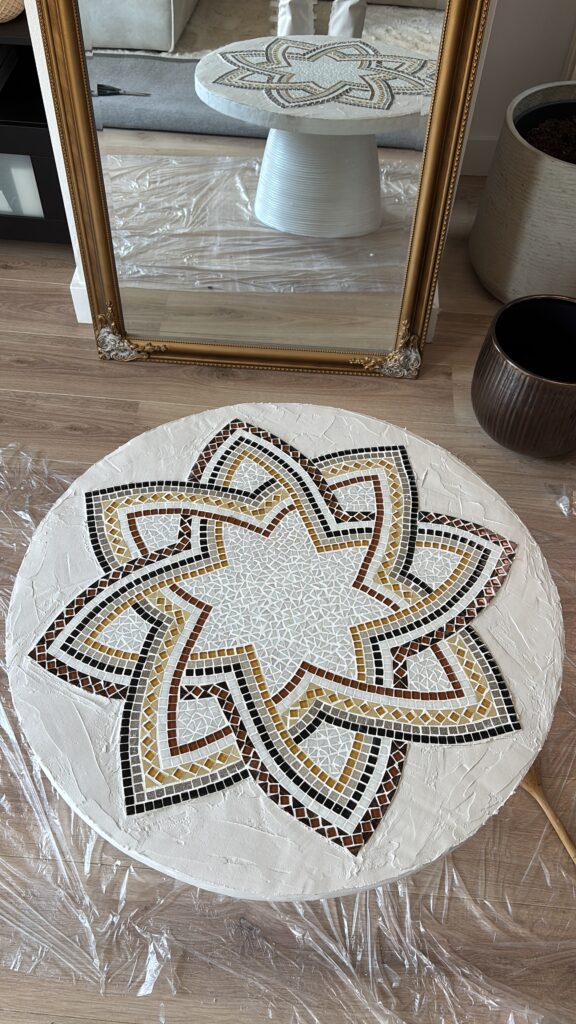
Finally, tape the mosaic stones if needed and paint the concrete part of the table to give it a protective layer. If you want to protect the table even more, you can apply a water repellent spray.
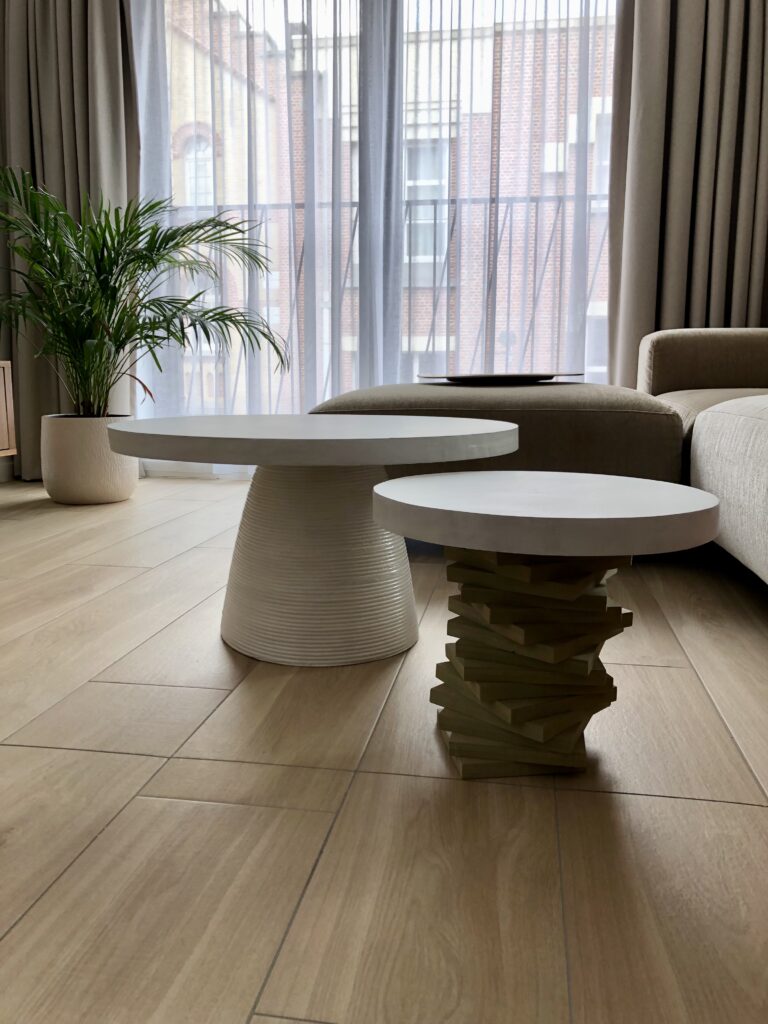
Final result
This is it. Hopefully, this article will make it easier for you to create your own unique piece.
